Happy 3rd blog birthday!

3 years of “Eating My Way Through Life”. Although, let’s be honest, I’ve been doing that since 1990.

I’m looking at ways to expand my blog. Literally. I’m running out of allotted WordPress memory. This has held me back in blogging about my holidays (last year in Taiwan/Singapore and this year in Melbourne).

Let me know your suggestions.

I am constantly confronted with real life situations in which a blog business card has been necessary. I’m often jokingly chastised by fellow bloggers for not having one. I don’t have one and I don’t really feel my blog is professional enough to reflect having such a professional regard to my ” blogging brand”. This is all personal fun for me. I invest zero money into it — only time.

So, who knows. Maybe I’ll cave in. Throw some coins at WordPress. Throw business cards in everyone’s face over the next year.

Thanks for sticking tight, friends, readers, strangers.

Happy 2nd blog birthday!

YOU GUISE.

My blog turned 2 years old yesterday!

How exciting.


A lot has happened in two years. It didn’t even start out as a 100% food blog. I still hate the word “foodie” and I’m still learning about cooking and food all the time. I still hate cutting onions and I will task it to whoever is around to avoid it (apologies to my boyfriend).

I’ve broken up with my ex-boyfriend, met my current boyfriend, started a PhD, discovered more about myself and am ever learning to come to terms with my mental health. I’ve grown up a lot since moving out of my parents house just before I started this blog too. Continue reading

Eating My Way Through Life is now on Facebook

Go, go!

Eating My Way Through Life.

You can “like” it.
And unintentionally tell all your friends that you like it because that’s what Facebook does with your details these days.

VALIDATE ME. 


I’ll link to all my blog posts so you don’t have to subscribe for email updates either.

I’ll occasionally post funny things that I won’t post anywhere else so it’s not worth your time.

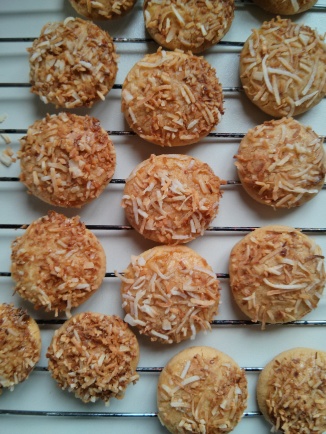
Recipe: Mandarin Butter Drops with Toasted Coconut + BONUS juice and coconut toffee recipe!

I recently acquired some raw organic shredded coconut. I wished to create something with them but what? I do not like macaroons. Something about weird chewiness that ends up hurting my jaw and too much sweet hurts my brain.

After a bit of google-ing, I stumbled upon this lovely recipe for Orange Butter Drops with Shredded Coconut. Excellent. Just what I needed.

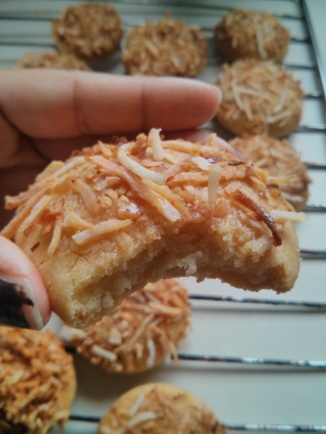
With a few twists of my own, I created a crunchy, crumbly almost shortbread-like cookie that doesn’t have an overbrearing sweetness with just enough tang from the juice. The toasted coconut adds such a delicious smell and texture – plus it looks amazing!

Mandarin Butter Drops with Toasted Coconut

IMG_20130508_150307

Makes: about 18

Ingredients:

  • 3/4 cup caster sugar (I have vanilla pods in my sugar so that they’re scented!)
  • Grated zest of 1 mandarin – this was really difficult because mandarins have such a soft skin, I grated some of the white pith as well, a little bit won’t kill you 😉
  • 2 1/3 cups plain flour
  • 1/2 teaspoon table salt
  • 300g unsalted butter, cold, cubed
  • 1 teaspoon vanilla extract (optional, if you don’t have vanilla sugar)
  • 1/4 cup fruit juice, or more if needed – I used apple and mago juice that I had in the fridge
  • 1/4 cup water
  • 1/2 cup brown sugar, or more if needed
  • 1/2 cup unsweetened shredded coconut

Method:

  1. Preheat oven to 180°C.
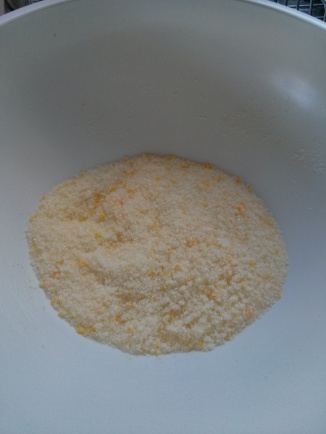
  2. Add zest to sugar in a large bowl and rub together. This step turns the sugar orange and makes it smell delicious – will be using in future for other recipes that require something special!IMG_20130508_125159
  3. Add the flour and salt. Mix.
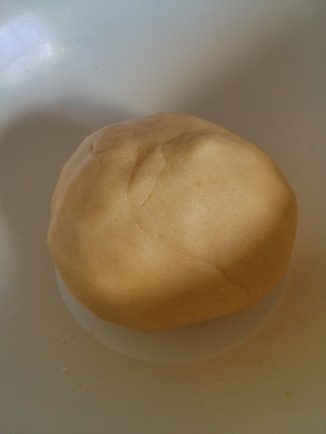
  4. Add butter and rub into mixture with hands. Knead until it forms a ball of dough.IMG_20130508_131440
  5. Scoop out a tablespoon-sized ball and roll into a ball. Place on lined/greased tray and gently press down. Repeat. Leave about 2-3cm between each ball. Bake for 16-18 minutes or until golden around the edges. Transfer to a rack to cool.IMG_20130508_144711
  6. Make the toffee glaze: In a saucepan over low heat, add the water, juice and sugar. Stir until sugar dissolves and the toffee begins to turn a dark brown. Take it off the stove and let it cool slightly.
  7. Toast the coconut in a fry pan over medium heat until it turns brown. Make sure to reguarly stir the coconut to avoid burning. Spread onto a plate.
  8. Dip the top of each cookie into the glaze, followed by the coconut. The cookies are quite hard so don’t worry about pressing firmly to get optimal coconut coverage. Set for 10-15 minutes to allow the toffee to harden so that the coconut sticks with minimal loss! (It would be a shame to lose!)

Bonus toffee recipe!

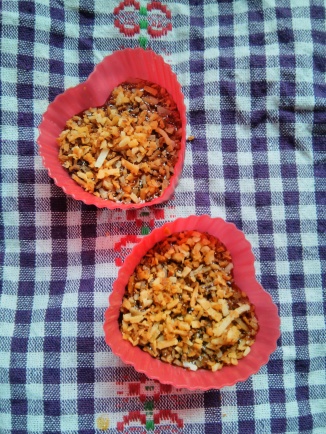
With the leftover toffee, I added them to moulds and sprinkled on the rest of the leftover coconut. Put in the fridge to set. Yum!

IMG_20130508_145957

Notes:

I love that I created two recipes out of this. You could always make more toffee so that you have more leftovers to make larger quantities of toffee. I dislike wastage so this was an excellent example of making two things from one! I love turning leftovers into a new meal. I.e. leftover bolognaise can easily become the base for nachos or tacos!

The cookie is quite hard and crumbly. The original recipe adds in cream cheese to the dough mixture which makes the cookie a lot more moist. You could also add a bit of juice or milk to the dough if you wanted something less dry.

The juice/zest can be anything. You could easily substitute lemon or orange zest into this recipe. I just love the fragrant smell of mandarins plus I didn’t have oranges or lemons.

When making the toffee, feel free to up the juice content as you go. You could even reduce it further after dipping the cookies in it so that it becomes less glaze-y and more sticky! The toffee glaze on its own would be delicious drizzled over puddings, ice cream, anything!

Cheat food

I have a confession. As a student, I am more than partial to cheap, crappy, premade foods.

Things I am guilty of enjoying:

Jarred pasta sauce. It’s in a jar and if you’re cooking for one, you don’t always want to make pasta sauce from scratch using one jar of diced tomatoes (which equates to pasta for lunch and dinner over the next 2-3 days). You can get ones with things inside them like mushrooms or spicy peppers or even red wine because I’m fancy and can’t afford a shitty <$10 bottle of “red” to make my own sauce. Plus, $2 jars make my heart sing.

Canned soup. They can be wholesome and hearty complete with meat and/or veggies. Plus, they require one pot. And then you can even eat out of the pot minimising the need for washing up an extra bowl. By using the Campbell’s can of ‘cream of’ soups, you even get the (unwarranted) satisfaction of cooking food with the addition of milk and water (Cream of mushroom is my favourite).

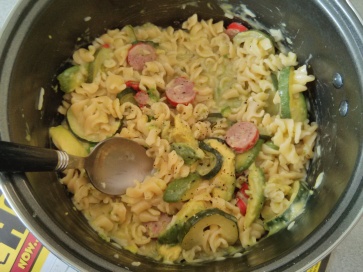
Instant pasta meals. As above, you have to add extra ingredients such as butter and milk to create your ‘gourmet’ meal. “Look at me, adding foods to a pan”. Plus, these things are delicious.  To be fair, they’re a good cheat base for ~decent meals with your own intuition i.e. adding protein and vegetables. Plus, they can be oh-so-cheap. Serves 2? Costs $2? That’s $1/meal. Take that, Curtis Stone, you creepy smiling jerk. Continental or bust, though.
IMG_20130325_120850

Continental’s Alfredo pasta. With my own addition of cabanossi, avocado and zucchini.

Fresh, stuffed pasta. Ravioli or agnolotti already have meat inside those moist morsels of pasta. That’s protein and carbs in one packet!! Just add pasta sauce (jarred or otherwise) and you’ve got a ‘balanced’ meal. Also, microwaving does not equate boiling in water and then draining. Um. Just trust me on that.

Canned fish. Canned tuna is utterly disgusting. Yet, on the rare occasion, I find myself topping my VitaWheats with flavoured canned tuna for lunch. It’s barely appealing but this “meal” has cost me $1. Am I complaining? Yes. But I shouldn’t. And I won’t complain long. As a healthier alternative, canned salmon and sardines are much better for you – they have healthier oils and contain calcium from all the bones you consume. They also taste significantly better. In fact, they have a taste.

Recent discovery:

Frozen mince. I nearly always buy mince in bulk of which I portion and then freeze in single serving sizes for later. But you can now buy pre-frozen mince. 5 star graded too. The meat is freshly minced and then snap frozen. The mince looks like short straight strands of frozen mince. THIS IS A GOOD THING. It means that when you add the meat frozen to the pan, you don’t have to worry about lumps. They’re all perfectly separated already!


This post is inspired by last night’s dinner using instant lasagne sheets, frozen mince, one jar of roast garlic and onion tomato pasta sauce as well as 2/3 jar of alfredo sauce. I do not have a photo for this but it was delicious (I did add lots of fresh veggies into it though, i.e. grated carrot, fennel, onions and zucchini). Also, this post is probably endorsed by my future cardiologist as they reprimand me about my high sodium intake.